

Welcome to Day 3 of the Handmade Christmas Ornaments Party!
Today, Becca @ Blue Cricket Design is bringing you some sweet and colorful ornaments. And just wait until you scroll down and see what she does with her front door.
So amazingly creative, I LOVE IT!
So here is Becca, have a wonderful Thursday!
I'm so thrilled to be here sharing with you my Homemade Christmas Ornaments! What an exciting event!
I'm Becca from Blue Cricket Design! I fell in love with the Idea of Paper Mache Ornaments when I was first introduced to them by my cousin! I did a fun Halloween version found here and have been counting down the days 'till Christmas was upon us and I could finally create my own Christmas version! Well wait no longer my friends! 'Tis the Season for Christmas Ornaments!!!


Here's the "How To" low down...
What you'll need:
- Those glass ornaments I'm sure you can find in your Christmas stash! If you need to go get some check your thrift stores first! I picked up a 24 pack for 50 cents!!! SCORE!
- A newspaper or all your left over Black Friday ads!
- The magic Craft necter MOD PODGE
- Paint
- Patience...the painting can take a while!
- Wire or Ribbon for hanging
- Beads for added touch!

- Get your balls ready! (trying not to laugh over here!)
- Take newspaper and rip it in to thin strips. If you rip from the top of the page to the bottom it rips super smooth and even. HINT!!The thinner the strips the smoother the paper will lay. Strips should be about 1/4"- 1/2" thick.
- Mix 1 part water with 1 part Modge Podge! Enough to submerge your paper in.
- Dip each strip into the MP mixture being sure to get it completely wet. Using your fingers wipe off excess mixture.

5. Start wrapping the wet paper strips onto the ornaments.
6. Continue wrapping paper strips and be sure to get the lip of the bulb that holds the top hanging thing.
7. Cover all of your ornaments completely.
8. Hang them to dry over night!
Once they are completely dried you can start to get crazy and paint your heart out!
Get creative with your designs and patterns!


Start with your base coats! I used the same color theme I have going on through out my entire home for the Holidays! Red, Green, White and Blue!

Once the base coat is dry you can start getting really creative! To create perfect circles use a glue stick cap and dip it in paint. Fill it in and there you have it!
 For fine detail work I used a tooth picks! It was perfect for my Snowflakes and Swirls! Lastly I sprayed mine with a fine Silver Glitter Spray for a hint of sparkle!
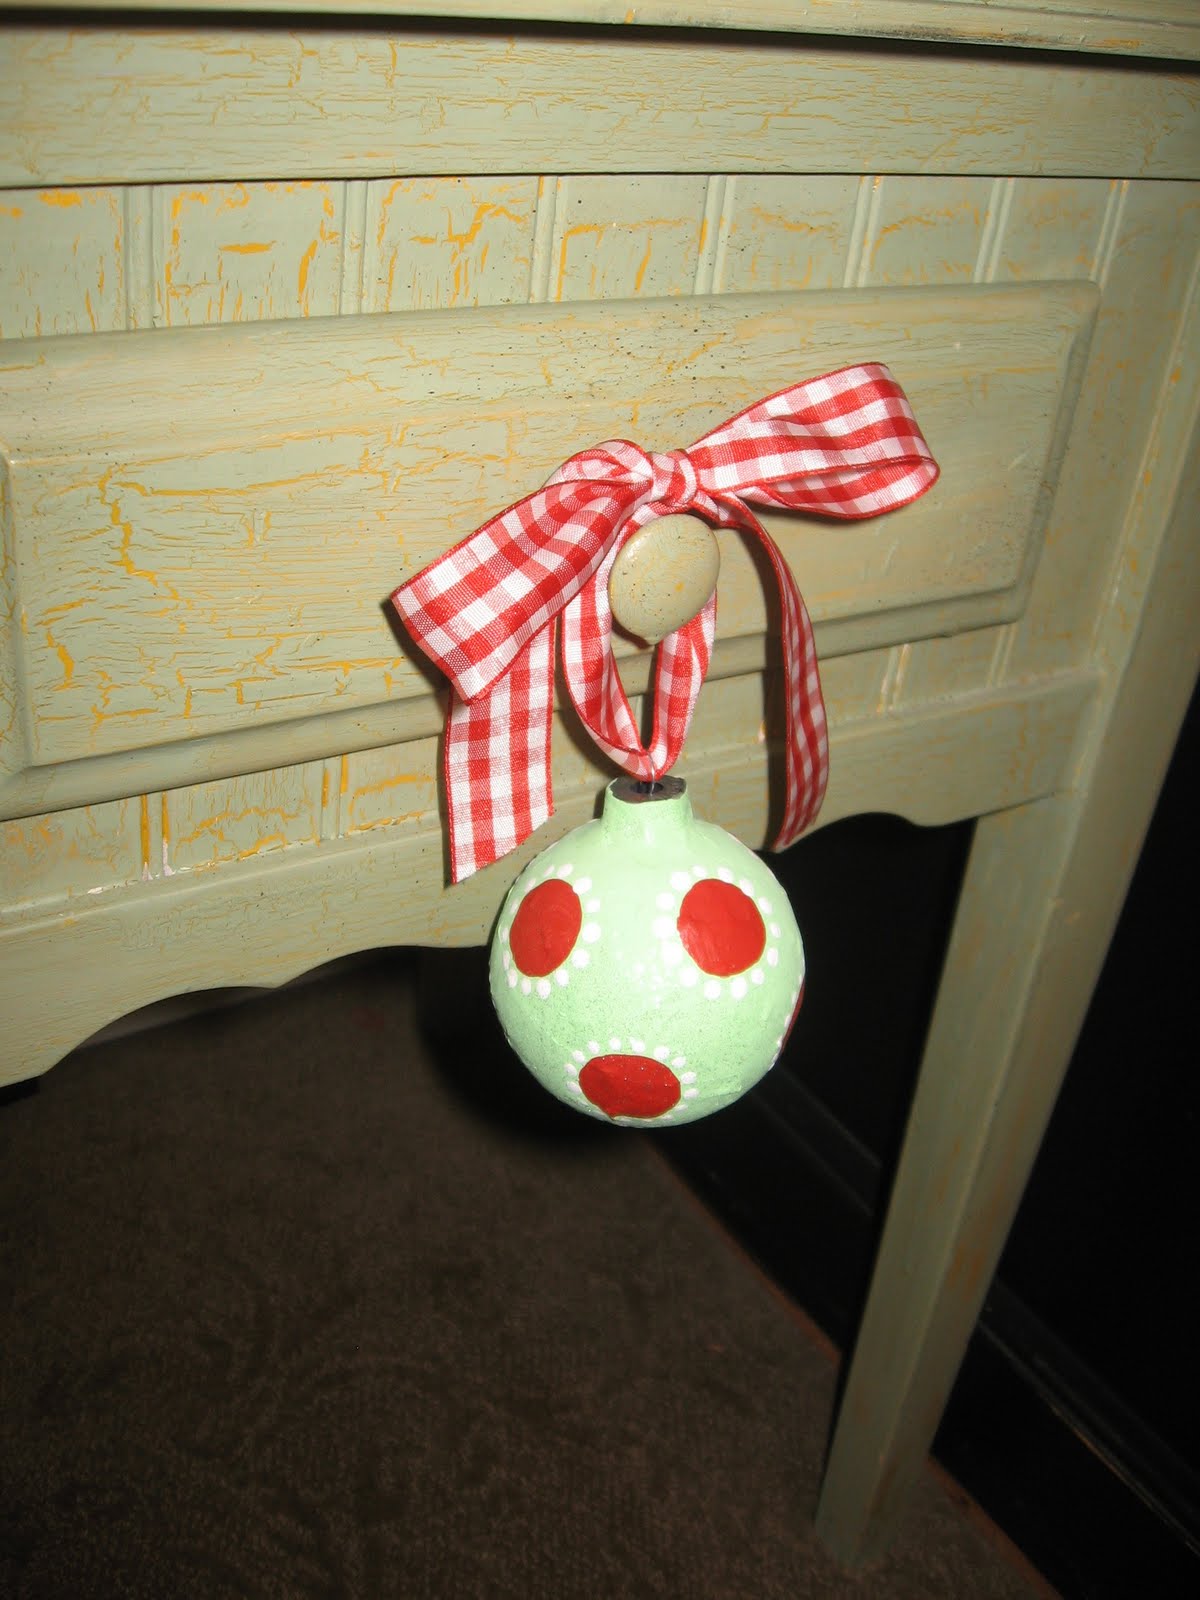
Add wire and beads if you plan on hanging them!I used Ribbon to hang mine! And think beyond the limbs of your Christmas Tree when it comes to hanging!
I have mine hanging on door knobs and cupboard knobs throughout my house. You could also display them in a bowl or basket or jar just as they are!


And Check out how fantastic they look hanging in my Frame on my front Door!


These ornaments are worth the effort! They are as detailed as you want! You can see I kept mine pretty simple! Whimsical charm awaits you as you create your custom ornaments! They also make perfect Neighbor Gifts or gifts for Teachers! Add a simple tag with a special message!
Come check out all my other fun Christmas ideas I have waiting for you over at
Blue Cricket Design!
Happy Holidays friends!
Love,
Becca
6. Continue wrapping paper strips and be sure to get the lip of the bulb that holds the top hanging thing.
7. Cover all of your ornaments completely.
8. Hang them to dry over night!
Once they are completely dried you can start to get crazy and paint your heart out!
Get creative with your designs and patterns!


Start with your base coats! I used the same color theme I have going on through out my entire home for the Holidays! Red, Green, White and Blue!

Once the base coat is dry you can start getting really creative! To create perfect circles use a glue stick cap and dip it in paint. Fill it in and there you have it!
 For fine detail work I used a tooth picks! It was perfect for my Snowflakes and Swirls! Lastly I sprayed mine with a fine Silver Glitter Spray for a hint of sparkle!
Add wire and beads if you plan on hanging them!I used Ribbon to hang mine! And think beyond the limbs of your Christmas Tree when it comes to hanging!
I have mine hanging on door knobs and cupboard knobs throughout my house. You could also display them in a bowl or basket or jar just as they are!

And Check out how fantastic they look hanging in my Frame on my front Door!


These ornaments are worth the effort! They are as detailed as you want! You can see I kept mine pretty simple! Whimsical charm awaits you as you create your custom ornaments! They also make perfect Neighbor Gifts or gifts for Teachers! Add a simple tag with a special message!
Come check out all my other fun Christmas ideas I have waiting for you over at
Blue Cricket Design!
Happy Holidays friends!
Love,
Becca


12 comments:
How fun! I love these.
I think this is so adorable and I love the frame on your front door!
oh my fabulous!
Those are so cute, cheap to make, and the door/frame idea is just stellar! I am definitely making these!
I love it, I have to frame my door now!
I love this!!! Thanks for sharing!
Becca these are awesome! :) LOVE the doorframe (as I mentioned yesterday) and I am super-jealous of your red door!
BECCA La ROo! These are gorgeous! And your door...STOP IT! I love the colors and WOW you took some times on these suckers!
Way to work your balls!
103!
These are so so cute! And the way they are displayed hanging on ribbon in a frame....inspired!! Really, really cute! Thanks for 12 day supply of ideas!
That door frame arrangement rocks my socks! Gonna bookmark this!
Oh-my-mercy, that is my most favorite Christmas decoration I've seen all season. I'm in L-O-V-E!!! Thank you so much for sharing your creation with us. I am so going to do this!
God's blessings, Sarah :D
Post a Comment