


Thanks for joining me to make a simple baby/toddler quilt out of a charm pack.
Part 1 includes the quilt top.
Part 2 includes basting and machine quilting.
Part 3 includes binding the quilt.
I chose a Riley Blake All Star 2 charm pack.
I will be using a craft size warm and white batting,
solid brown flannel (1 yard) for the backing and
1/2 yard for binding fabric (not yet chosen)
This quilt will finish around 27" x 32",
its small but a great size for a little one.
OK here we go.
First, open up the charm pack (or your assorted 5 inch squares) and lay them out so that you can see them.

Choose 2 squares, if you are using a charm pack the squares should all coordinate.
You can be as random as you like with it.
Just avoid joining 2 of the exact same prints
(if it includes reprints within the charm pack).

Place the right sides of the fabric together and pin in place.

If you have a quilting foot or 1/4 inch foot it is best to use it.
(the one on the left in the picture below).
For quite a while I thought my standard foot measured 1/4" - it is actually 3/8",
I didn't know there was a special 1/4" foot.
You will mostly see patterns call for a 1/4" seam allowance.
It is important that all of your seams have the same seam allowance when you line them up to create the quilt top.

Using a 1/4" seam allowance, sew the 2 squares together.
Do not break the thread there,
we are going to make this go fast and chain stitch the squares together.

Stitch all the way to the end and then place the next two squares in the machine and keep going. This will create a long chain of squares.

See how it looks like a chain of stitched squares.


Cute the thread between squares.
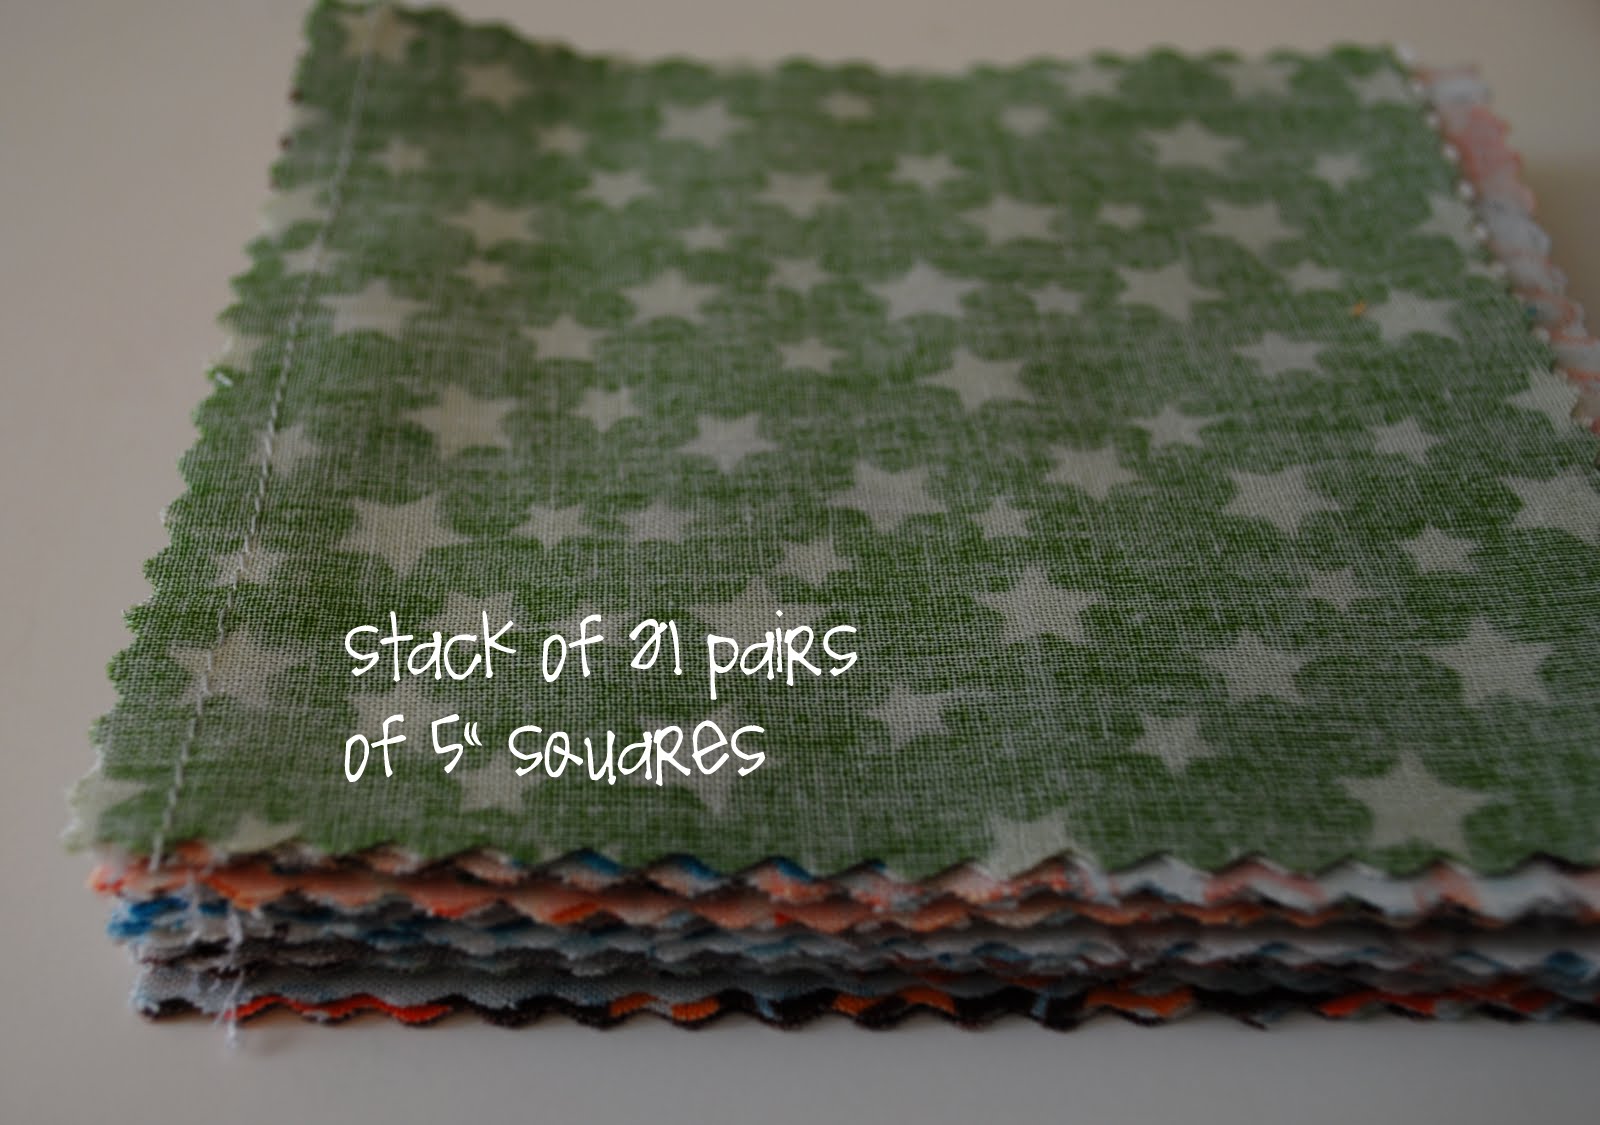
You should now have a pile of 21 pairs of stitched 5 inch squares.
Take those stitched squares and open them up and lay them out so you can see them.

Use the same process as above,
take two pairs of stitched squares and place right sides together.
Pin and sew using a 1/4 inch seam allowance.

Add another set to create a row of 6 squares.
You will create 7 rows consisting of 6 squares.
Press your seams to one side, you will alternate sides for each row.


Once the seams are pressed to opposite sides,
place the rows right sides together with the seams lining up as closely as possible.
This is where that 1/4 inch seam allowance is important. T
he seams won't line up properly if the same seam allowance is not used.

Pressing the seams to opposite sides allows them to nest together.

Pin at each seam and sew with a 1/4" seam allowance.


Press the new seam to one side.

Press the seams on the right sides of fabric too.

Keep adding rows to the quilt for a total of 7 rows.

And there you go.
Now you have a quilt top!
Part 2 will include basting the quilt and machine quilting
(I will be using straight line quilting so you will not need a special foot, if you choose free-motion quilting, you would need a darning foot or open-toe foot).
See you soon for Part 2.


10 comments:
This was such an amazing tutorial. I am soo excited for part 2!!
Great stuff! Can't wait for the next part. I've never done any straight line quilting, and I'd really like to learn how.
So glad to have friends joining in! Can't wait to see your creations. Kristin
That was very helpful! I'm new at quilting, and I didn't know the bit about the 1/4 foot or what exactly a darning foot is either. (Where did you buy yours??) Thanks for explaining things that I guess are so important, yet never really mentioned on other blogs! (I'm going to keep reading your tutorial to learn more.)
Thanks again!
What an amazing blog! I want to make a quilt for my both my niece and newphew for their christening and these tutorial have been most helpful! Thank you so much!
Thanks Kristin,
I just completed this quilt project and had a great time making it. This was my first quilt ever. Thank you for the easy to follow directions. You are awesome!
Very cute! I was wondering, though... when working with charm packs, does the 1/4" measure to the outer points of the pinked edges or to the inner dip towards the fabric?
This was a great tutorial and easy to follow...I just finished my first quilt for my nephew...all Thanks to you..
Your Tutorials are very well done... easy to follow and nice pictures. Thank you for taking the time to make this. I keep going in circles with my charm packs and you gave me some direction!
This sounds like such an enjoyable project!
Post a Comment