I made this little guy over the weekend.
Won't he look great on the Thanksgiving table????
It is made from 2 yarn covered styrofoam balls and book pages along with some felt and fabric scraps.
This is how I made it.
Supplies needed:
Yarn (2 colors)
2 diferent size styrofoam balls
scrap felt
scrap fabric
glue gun
pins
and old book
paint brush
Optional: distress ink
First, wrap the yarn around one of the styrofoam balls. It helps a bit to glue the end down with a small drop of glue and then start wrapping.
Keep wrapping
Wrap until the entire ball is covered (such as the one of the left). Once you are done, take a straight pin and pin the loose end into the styrofoam ball.
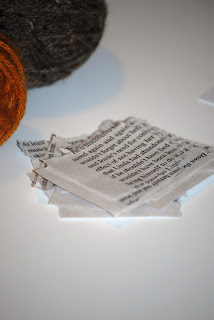
Find an old book and rip some pages out.
Cut or rip them into 1 inch squares (not exact just roughly 1 inch)
Wrap the piece of paper around a paintbrush end so that it becomes somewhat of a cone shape.
Dab a little hot glue on the end of the paper.
Keep the paper wrapped around the end of the paintbrush and push the paintbrush along with the paper into the styrofoam ball. It is a little more difficult with the yarn wrapped around the ball but the hot glue will help keep it in place.
Add the paper pieces into the back half of the ball.
This will make the turkey feathers and will also help keep the body of the turkey upright.
Next hot glue the smaller ball on top of the larger ball to make the head and the body of the turkey.
This is the completed back.
Once all of the paper pieces were in place I used some distress ink to give the feathers a little more character.
The picture below shows the paper pieces with distress ink on the right and without it on the left.
I made the face with 2 small felt circles for the eyes,
1 felt triangle for the nose and
freehanded the waddle in felt.
Once the felt was cut to the right size for the face, I cut fabric scraps to be hot glued onto the felt.
Then I hot glued those pieces onto the turkey face.
And there you go.
To add the name banners, I found a cute font in Word and printed them. I cut the triangles in each side and pinned them into the body of the turkey.
I think he needs some buddies...


13 comments:
Too cute!
Adorable! Thanks for sharing!
LOVE LOVE LOVE this! and so much fun to make, thanks for sharing.
I am sharing your project in my "why i love fall" post, come on over and check it out :)
These are SO cute! I may have to try this for the kids' table!
I hope theres one with my name!!
Those are super cute!
These are SO cute!!!
These are adorable! What a great idea. I will definitely be saving this.
So creative and original !
I love these.. very pretty!!! I can't wait to reset my tables for thanksgiving. I just LOVE this time of year.
simply adorable!
Oh my gosh these are so cute! I just clicked over from The CSI Project and I'm so glad I did. I would love to link to this if you didn't mind.
I would love for you to share this on my Thanksgiving Link up!
www.kirstikoo.blogspot.com
So cute!!
Post a Comment