


Charm Pack Baby Quilt Tutorial Part 2
So now you have made the quilt top,
let's baste and machine quilt.
Materials Needed
Quilt Top
Backing Fabric (1 yard)
Batting (craft size)
painters tape
safety pins
First, iron your backing fabric.
You may choose to prewash the fabric,
I do not because I wash the quilt once it is all put together.

I am making this quilt for a sweet friend who is having her first baby (a boy)
"any day now" as she tells me.
So I have chosen to add some initials to the back and a couple of extra charm squares.
I have included the instructions but they are not at all necessary.
Please skip through these steps if you like and pick back up where it says,
"making a quilt sandwich".
~~~~~~~~~~
I had 6 extra charm squares.
I am using them to add some interest to my backing fabric.

I added the lower case initials "c" and "b".
I freehanded the block letters below iwth a sharpie and piece of white paper.

Then flip the paper over

and re-trace the letters.

Then take a piece of fusible web and trace the backwards letters onto the paper part of the fusible web.

Once traced, cut out each letter so that it will fit on the fabric.

Now, place the sticky side of the fusible web
on the wrong side of the fabric and iron.

Cut out the letter but leave the paper backing on until you are ready to place it on the backing fabric.


I use the back of my door to hang small quilts/blocks/rows, etc.
I have the quilt top hanging behind my backing fabric to make sure the initials will fit properly on the quilt.
Pin the initials and blocks where you want them to go on the backing fabric.

Once you have everything pinned in place,
take the backing paper off the initials to iron in place.


I chose to applique the letters using a blanket stitch.
I changed my foot from the quilting foot to an applique foot (standard foot)

The blanket stitch on my machine is 05.

Machine applique the letters to the backing fabric using a blanket stitch.
Go slow and you will need to rotate the fabric around the corners.
Make sure the needed is down and the presser foot is up,
then rotate the fabric slightly. Lower the presser foot and continue to sew around the outer edge of the letter.


Making the quilt sandwich
Find a clean, flat surface to make your quilt sandwich.
I am using my dining room table.

First, lay out your backing fabric with the wrong side of the fabric facing up.

Tape the corners of the backing fabric with the painters tape.

Next, lay out the batting on top of the backing fabric.
Smooth the batting down as you go.

Once the batting is all smooth, lay the quilt top on the batting.
Smooth as you go.

Peel back the batting just a bit on the corners to make sure your quilt top is not too close to the edges. The backing and batting should be a bit larger than the quilt top.

Basting the Quilt
I use safety pins to baste my quilts.
Some use a spray adhesive, I have never tried it so I will show you this way.
These pins are slightly bent and made for quilt basting.
Any pins will work.

Pin every other fabric square in the middle of the square.
This will keep the quilt backing, batting and top in place as you machine quilt it.
Be sure to continue to smooth as you go.

Trim the excess backing fabric and batting to about an inch or two around the quilt.

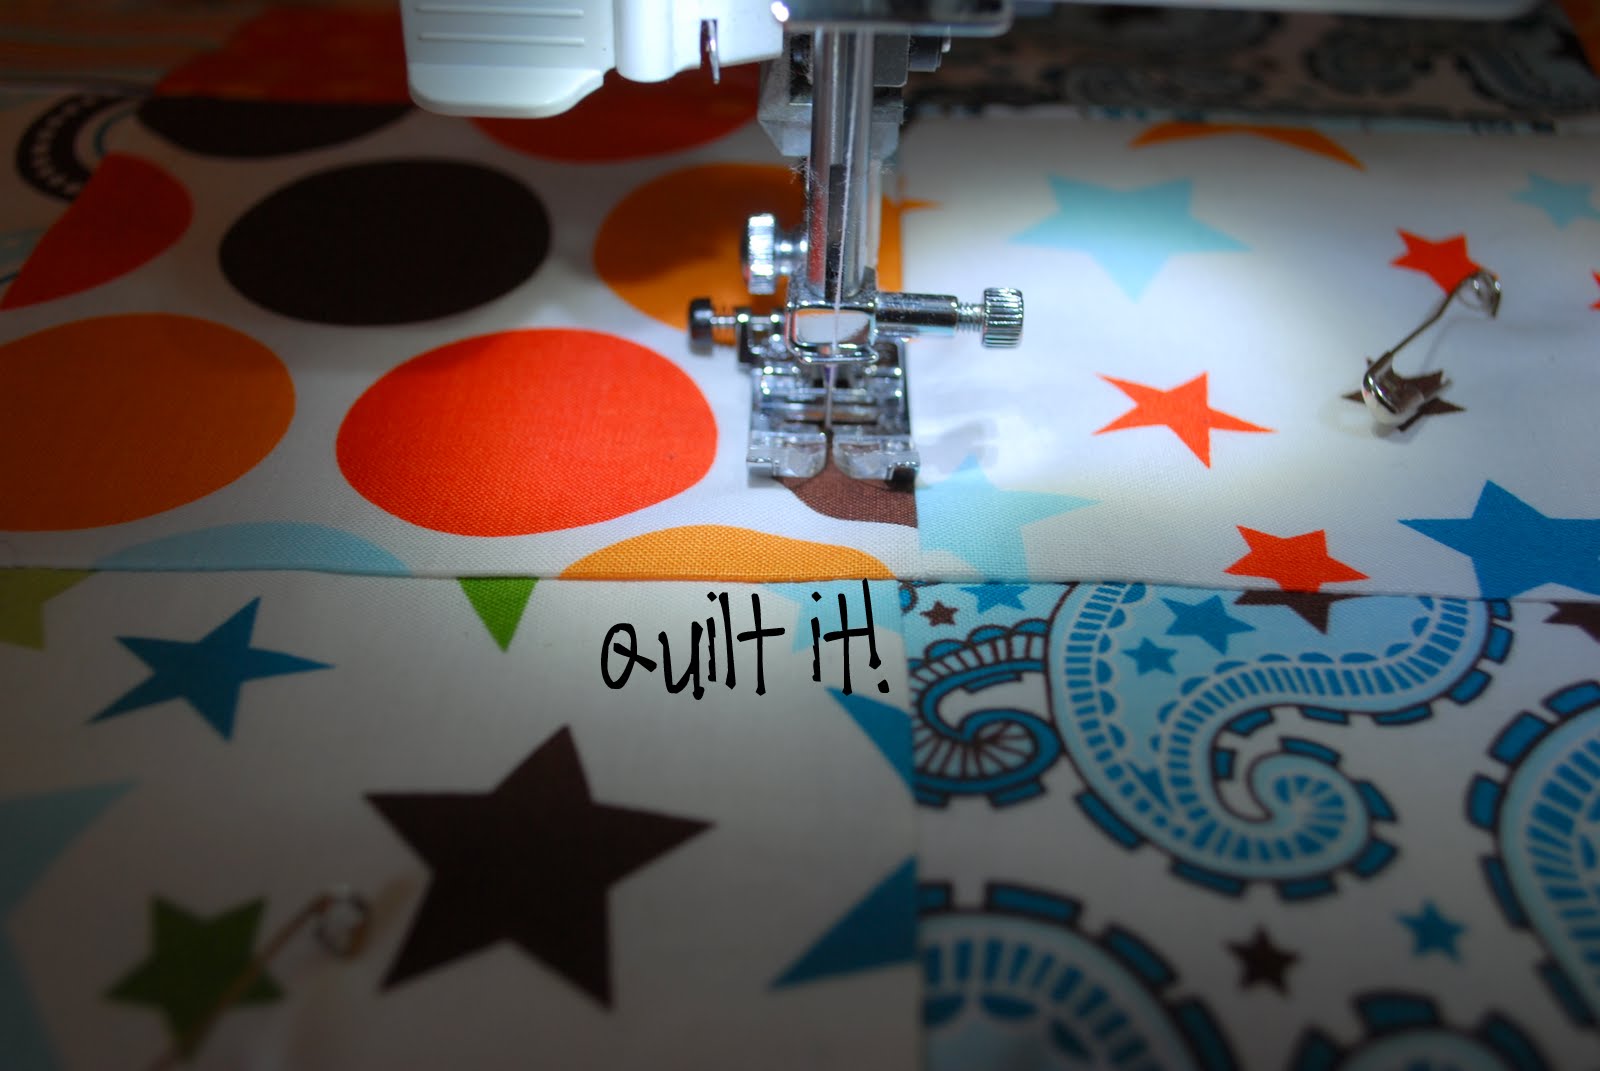
Machine Quilting
I will be using straight line quilting so you will not need a special foot,
but a walking foot would be nice if you have one.
It feeds the fabric evenly on top and bottom.
My machine has an integrated walking foot, it is that black piece that
comes down right behind my foot and presses the fabric down.

Choose one of the squares in the middle of the quilt to start your
machine quilting.
Line up the edge of your foot and the edge of the fabric and starting about 1/4 away from the edge of the square stitch a straight line.
Stop about 1/4 inch away from the edge.
After you stop, make sure the needle is down.
Lift the presser foot and rotate the fabric one quarter turn.

Lower the presser foot and continue to stitch around the entire square.
You are making a smaller square within the charm square.
Once you come back to your original starting stitch,
backstitch 2 to 3 times and cut the thread.

For this quilt, I am making 2 squares in every other square and one square in the others.
Use the same method as above and use your stitches as a guide.

There you go!
Continue this process in each charm square.

This is the back so you can see the alternating quilted squares.

Next we will bind the quilt and then we are all done!
Leave me a comment if you are quilting along, I would love to hear from you.


6 comments:
I'm so excited to see this! I made a quilt top using charm packs back in the fall, but never finished it because I wasn't exactly sure how. Now I can't wait for some extra time so I can use this tutorial & finish!
BEZEL INDUSTRIES LTD. - Supplier & Trader of wire forming machine,used wire forming machinery from India - Visit the online business of wire forming machine manufacturers,used wire forming machinery suppliers,wire forming machinery suppliers.
Even though I'm not sewing along right now, you inspired me to go out and buy a quilting foot today. I can't wait to try it out. I'm loving this tutorial.
I'm not sewing along with you at this present moment but as soon as I get to the craft store I'm buying a charm pack & deff will be making this :). One for my little girl toddler bed, and one for each of my three friends who are having babies this year. Thanks for the great tutorial can't wait for the rest!
dominiquescraftcouture.blogspot.com
I have been wanting to learn quilting, but did not know where to begin. Thanks to you, I have begun.
After purchasing the charm pack and a 1/4 in. ft., I have begun and I am loving it.
Just finished the top. I purchased a chenile fabric for the backing (this will be for a new baby niece). I will be attempting the sandwich this week.
I am having great fun thanks to you and your tutorial. THANKS!!!
Even though I'm not sewing along right now, you inspired me to go out and buy a quilting foot today.
Tours and Travels
Post a Comment