Monday, December 7, 2009

Day 7 of Handmade Ornaments and a Winner!

Welcome to Day 7 of 12 Days of Handmade Christmas Ornaments!

Today Char @ Crap I've Made (don't you just love the name of her blog) is bringing us an ornament from her childhood. Oh, an we all hope your little on is OK Char - keep reading, you will see!

The winner of this ornament is...

Shan B!

Please send me an email at kristinDOTheaneyATgmailDOTcom with you mailing address.

~~~~~~~~~~~~~~~~~~~~~~~~~~~~~~~~~~~~~~~~~~~~~~~~~~~~~~

Thanks to Kristin for having me! I'm Char from Crap I've Made.

These ornaments are a re-creation of some my mom made when I was a kid.


DSC_1498

Supplies:

Styrofoam balls. I used 2.5” and the template I have included is for that size ball.
3 elastics
Sharpie
Fabric scraps
Butter knife
Ric rac or ribbon
Straight pin
Glue

Stretch 3 elastics around the circumference of your ball, spacing them evenly so that the ball is divided into sixths.


DSC_1482

Trace placement of the elastics with Sharpie.


DSC_1483

When you take off the elastics, you should have something like this:

DSC_1484

Cut 6 scraps of fabric to match this template. You can do all 6 different, all of them the same, 2 each of 3 different fabrics…whatever!


DSC_1486

I should have pressed them at this point, but I have MAJOR ironing issues. Hopefully that doesn’t bother any of you the way it bothers me.

Place one of your fabric pieces centered evenly over one of the sections of the ball. You can see a glue stick in this picture. I used it to hold the fabric in place but I’m pretty sure it didn’t help and I didn’t actually use it on any of the other sections.


DSC_1487

Take your butter knife and start tucking the edges of the fabric down into the ball along the lines you drew with the Sharpie.


DSC_1488

Do this along both sides. Make sure to keep the tips pointy. You should have something like this:

DSC_1489

Move to the next section and do the same thing.

DSC_1490

Continue with the remaining sections.

DSC_1491

Pick the ugly end and make that your top.

Cut a length of ribbon or ric rac about 7” long. Make a loop and stick a straight pin through to keep the ends together.

Put a generous glob of glue on the top of your ornament.

DSC_1495

I used FabriTac because hot glue and I have a sordid past.

DSC_1494

Stick your straight pin and the ends of your ric rac down into the glue.

DSC_1493

Use your butter knife again to jam it down into the crevice (that word makes me giggle).

And…

DSC_1504

Also, if you don’t adequately supervise your child whilst you’re blogging, this could happen:

DSC_1510

Pretty sure he’ll be OK. He ate part of a KFC container once already.

Sunday, December 6, 2009

Day 6 of Handmade Ornaments

Hi everyone, today is Day 6 of our 12 Days of Handmade Christmas Ornaments.

Today, Emily @ Not So Idle Hands is here with her cutie girls showing us her handmade ornament. It is awesome, I hope you all try it out.
Have a wonderful rest of the weekend! And be sure to check out the giveaways going on here, just keep scrolling!


Here is Emily!


Woo Hoo!

Hi, I'm Emily (or MLE.....get it M~L~E?) from Not So Idle Hands and I'm SO excited to be here guest crafting with Kristin!


When she asked me to help out with this......I knew exactly what ornament I wanted to show.

So on with the show!


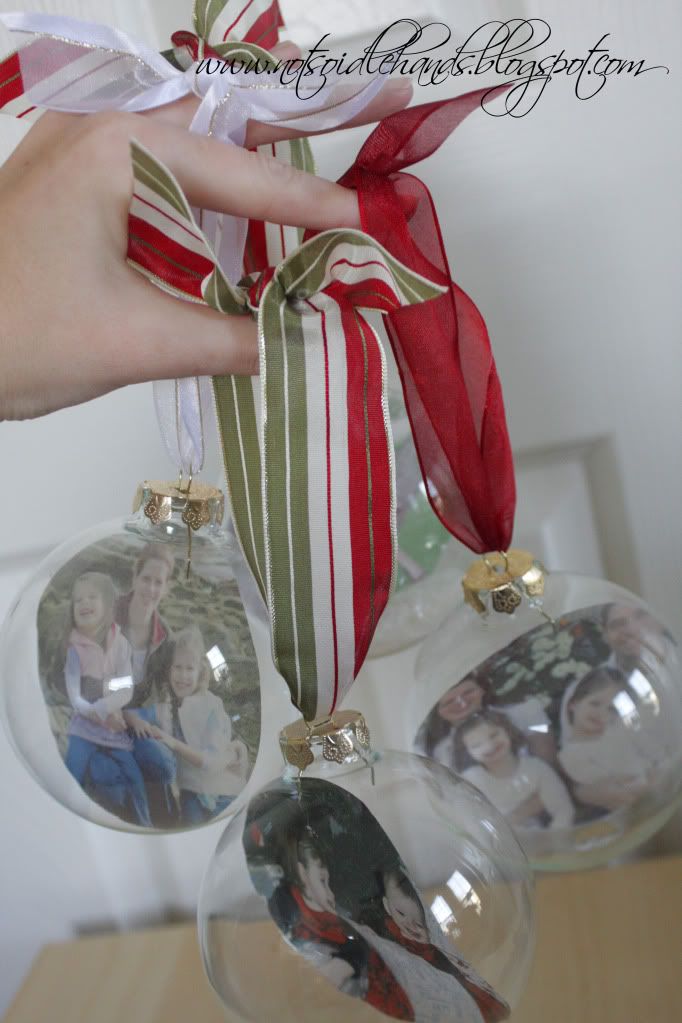
I saw some like these on my friend's Christmas tree a few years back and HAD to make some myself! I've made these as gifts for grandparents and we have TONS on our tree each year too :)
AND.....

SO easy!!

Start off with some:

Plain glass ornaments (any size you want, but I like the 4in. (or 100mm) size since they are nice and big).


  • Vellum


  • Photo printer


  • Some Big, Fat, Purdy ribbon


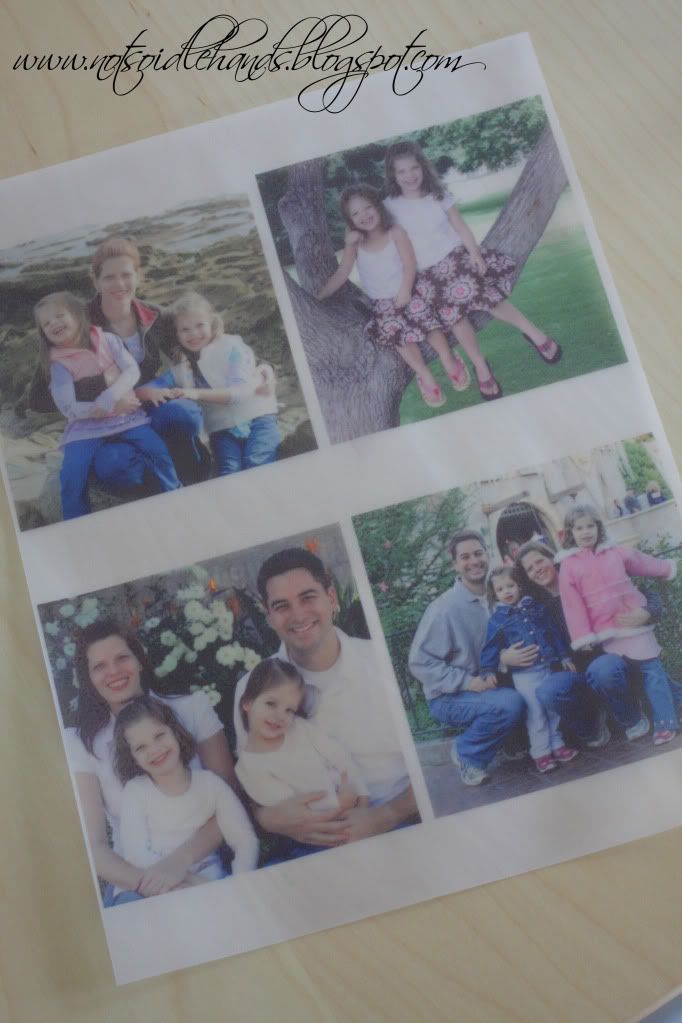
    Open your pictures in Photoshop or other editing software and size them down to 4"x 4" and print out onto the vellum. (Sorry, but these pics printed kinda grainy)


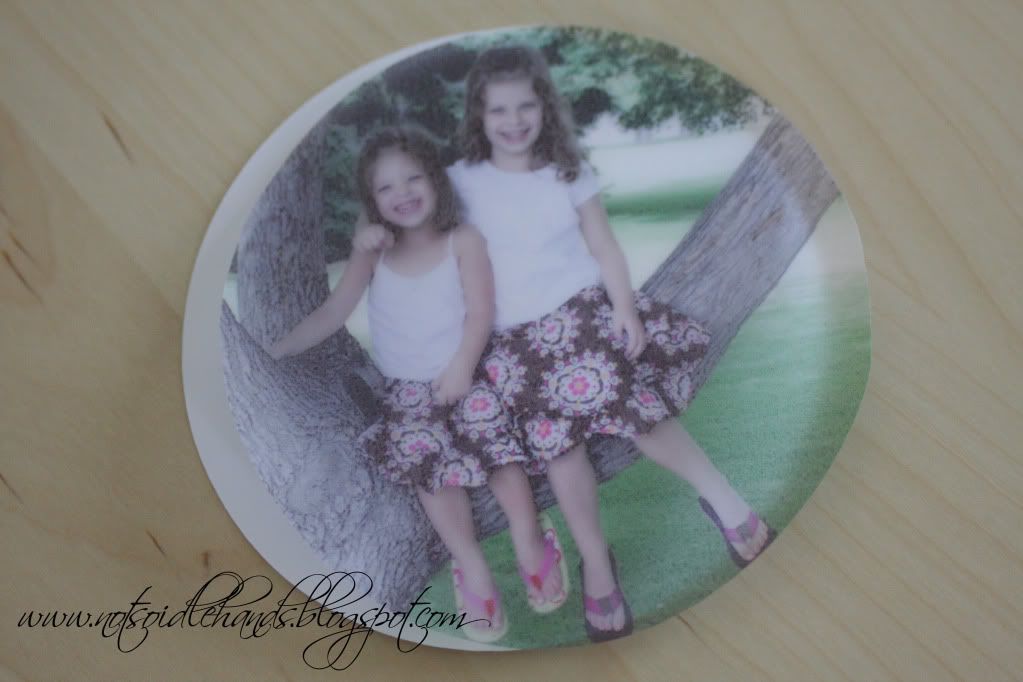
Then, cut out in a 4in diameter circle. I cut a 4" circle out of cardstock (yup, using my Cricut) and used that as a pattern.


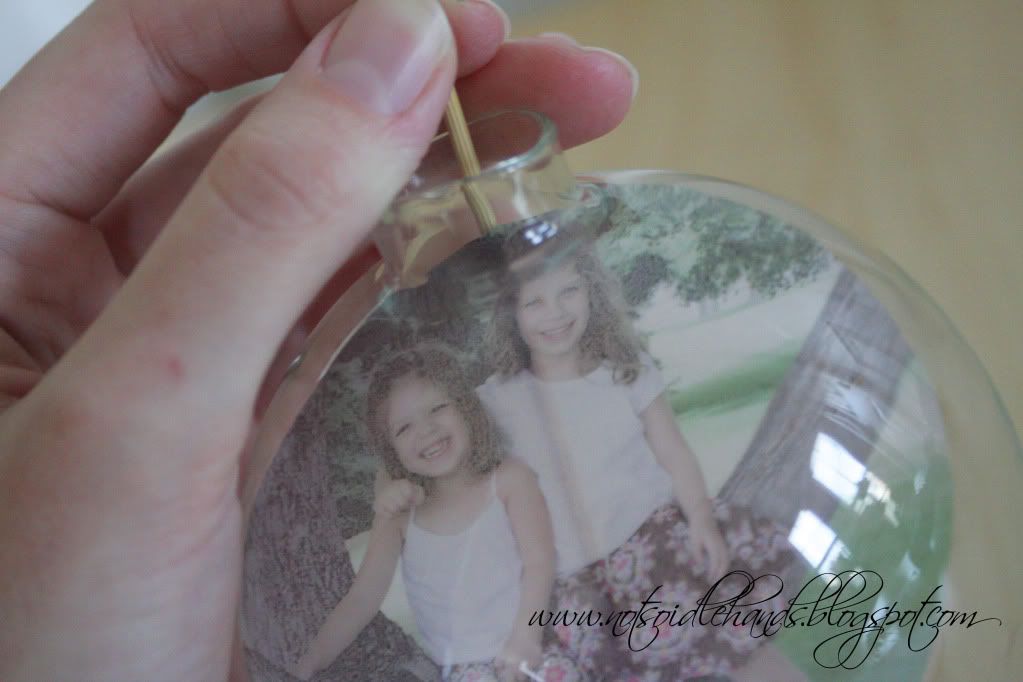
Then, roll it up and slip it into your ornament.


You can use a bamboo skewer to help get it in the perfect position, then i hold it in place with the topper (as shown).


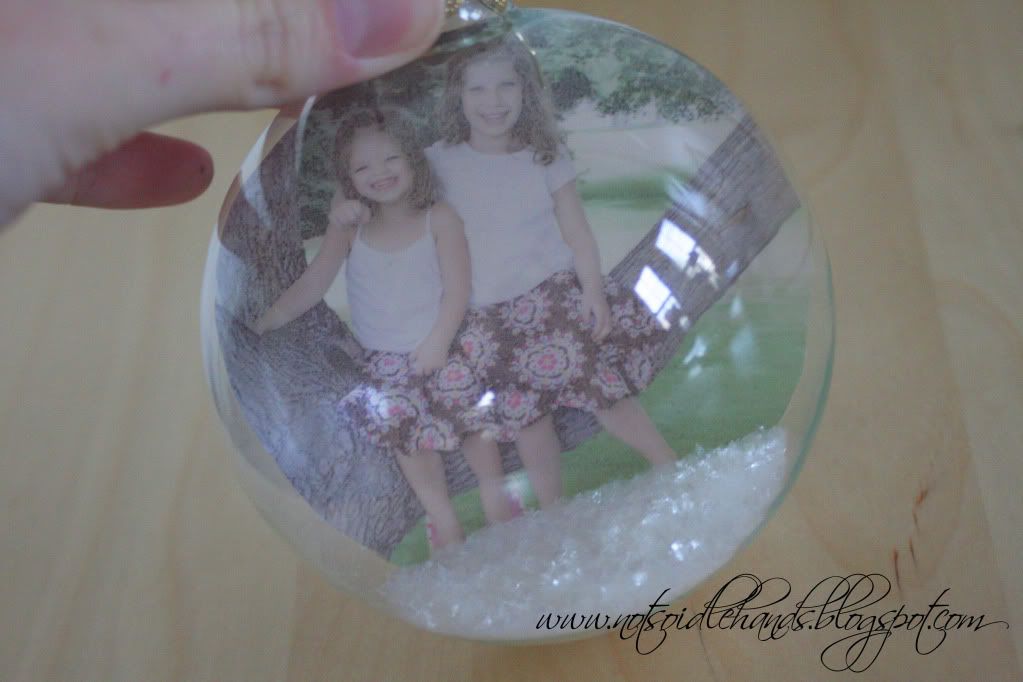
The girls really wanted me to put snow into one of them.....and it actually looks pretty cute! Just add some till you like it (I used Martha Stewart snow glitter). But, I guess it would have been better to not put snow in the picture that was taken in August :0)


Now, top it off with a big fat ribbon......


and be sure to hang it in front of some lights on your tree so they shine through!


Be sure to make plenty for all the relatives and grandparents and stop by Not So Idle Hands often to catch my 25 Days of Christmas!


Saturday, December 5, 2009

Winner and another giveaway!

Good evening out there in blog land. How are we all doing tonight?


Just got home from watching the UF vs. Alabama game at my parents, they are big Gator fans and were not too happy with tonight's outcome. Sorry Mom & Dad.


I spent my night hand stitching the binding for these little babies. I can just show you a little bit as these are top secret (but I do not think any of the recipients read my blog). So I thought I would show you all what I am doing with those cutie little charm packs.


I am making 5 doll quilts for 5 certain girls' American Girls for Christmas. 3 are finished, 2 to go. I think you know what I am doing on this chilly Florida Saturday night.


You like them? I am loving them!

This one is my favorite so far.
Now onto the winner of the giveaway, using Tara Frey's Random Number Generator, the lucky number is.....


8


Our lucky lady this evening is Steffany! Congrats to you Steffany. You get to choose a mini Moda charm pack of either Lakeside Resort by Holly Taylor or Garden Party by Blackbird Designs.


Steffany's entry telling me she is a follower is what won her this loverly prize but she also said,

"I would make some more word blocks. I have some on my blog that spell Merry. Just mod podge, fabric and embellishments...I love them."


I will be sending you an email soon to get your mailing address and your choice of fabric.


So I was not able to try Angie's ornament today, but I am sure I will very soon. I am going to give away the other charm pack (the one that Miss Steffany does not choose) to another lucky reader.


I think I am just going to choose a wonderful follower, so make sure to become a follower and I will randomly pick someone on Monday night around 7 pm Eastern Time.


But you can always leave me some nice comments if you like!
I really do love to read them all.


Thank you Angie @ This and That for today's ornament!!!! I am so happy you could participate.


OK everyone, comeback tomorrow for our next ornament brought to you by


She is currently having a 25 Days of Christmas on her blog so head on over and check her out.

Day 5 of Handmade Ornaments

Happy Weekend Everyone!
Welcome to Day 5 of the
12 Days of Handmade Christmas Ornament Party!
Today, Angie at this and that is bringing us this super cute and easy ornament. I hope you all give it a try along with all of the other amazing creations we have seen over the last few days.
Here is Angie!


I am so flattered that I have been asked to be part of this awesome event!


I am Angie, from this and that. I have to say, when Kristin asked me to take part in the 12 Days of Handmade Christmas Ornaments, I had NO clue what I was going to do! I headed straight for the dollar store to get some inspiration…3 minutes later I had it…
Here is what I did:


Supplies- Styrofoam ball
Black acrylic paint and paint brush
Ribbon
1 straight pin
Cheap bead necklaces or beaded tree garland
Hot glue gun and glue

Step 1- Paint ball with paint. Dry.
Step 2- Stick the pin through the ends of the ribbon and stick it into the ball.


Step 3- Starting at the ribbon ends, glue a circle of beads at the top of the ball. Cut the bead string, and start a new row next to the first row by putting a line of glue on the ball and then putting the beads on top of it. So this until you get to the very bottom of the ball.


Step 4- Enjoy your new unbreakable Christmas ball and hang it on your tree.


I admit, when I first started doing this I didn’t have much faith that it was going to turn out cute. The pictures really don’t do it justice. I can just see a tree with these ball all over it, so pretty and shimmery!

Come and join me at
this and that for some more holiday inspiration!

Friday, December 4, 2009

Winner and another Ornament Giveaway!

We have a winner for the Day 2 Giveaway.
I used Tara Frey's Random Number Generator, and the lucky winner was number 6.

Congrats to ConnieBabe!
This is what she said about her favorite Christmas song,


"My favorite is 'O Holy Night'...although, it's usually just whatever I'm listening to, like right now, Barry Manilow's 'Because it's Christmas'.
That's a good one too!"
I think I added that to my playlist and some of the other suggestions. Hope you all are liking the music at the party!


So thank you again to Linds for today's 2 awesome ornaments. I would have tried those cutie little (big) sleds but I could not get out today to seach for them so I thought I would try the ball instead.
I searched my house for some painters tape or something similar but I just could not find it so I thought maybe I would try a version of this ornament with felt so that I could give it away and ship if off easily.
It is by NO means perfect but hey its handmade and its free!
What could be better, right?
Want to win it?
We'll make this easy...
1. Leave me a comment and tell me what you are asking Santa for this year.
I will select a winner on Sunday night around 7:00 pm eastern time.
GIVEAWAY CLOSED
Come back tomorrow because Angie at This and That is bringing us our Day 5 ornament and you will definitely want to see this one.


Day 4 of Handmade Christmas Ornaments

Welcome to Day 4 of our sweet little ornament party!

Lots of fun things going on around here so keep scrolling to see Days 1 - 3 below and some awesome giveaways if I do say so myself.


Today Linds @ That's So Cuegly

is bringing us not one, but two ornaments to try out. You all lucked out today!


Hope you enjoy and Happy Friday to all!


Here's Linds.

~~~~~~~~~~~~~~~~~~~~~~~~~~~~~~~~~~~~~~~~~~~~~~~~


HEY EVERYONE! IT'S LINDS! FROM


{something JUST ugly enough to be CUTE!}

LETS TALK CHEAP, SHALL WE?

I had OLD silver balls, that were going to be thrown out!

Untill I saw the coolest ornaments online, but they were $65 for TWO!!!

So I made my own version (a little sloppier version, but HEY! Homemade!)

1: Plain Ball
2: Spray Painted Ivory-White

3n4: Electrical tape to shape designs to paint!(cuz it's HARDLY sticky and wont peel off your paint jobDoing ONE shape/stripe at a lonesome time, I used BLACK acrylic craft paint!

TADAH!!!

I'm pretty proud of these. By all means they're a disaster, but hanging on a tree from a distance, you cant tell that not ONE shape is symetrical! But these THREE were all I made because it was time consuming. Which is probably NOT what you want to hear. But I'm actually thinking of doing a BLACK/WHITE/RED tree next year because I LOVE these so much so I'm holding onto all my balls! (teehee...{Becca})

ROUND 2:


It was Black Friday Morning and I was at my last shopping store....

Porters Craft and Frame!

While I was waiting in line to check out (LONG LINE) I saw these wood Sleds. They weren't painted or touched, and they were big, and only $1...hmmm. SURE!!! I grabbed 7!

PAINTED THEM DARK BROWN: MOD PODGED

CHRISTMAS PAPER ON TOP

AND EMBELISHED OF COARSE!!!


AND HUNG THEM ON MY TREE. Now my DH who we'll just call Josh for now, didn't like the idea of having ornaments bigger than my hand on the tree(I have big hands)...but what do YOU think?

I ABSOLUTELY LOVE Sleighs and Sleds.

Edited to add: Linds sent me the picture of her whole tree. Look at how cute these sleds are! Thanks for sending this over, I know people have been wanting to see your tree.

Eventually, my Christmas decorations will be themed in that direction! I'm getting there!


TIS THE SEASON!!

SPREAD THE LOVE!!

Speaking of which THANKS AGAIN KRISTIN!

-Linds-

Thursday, December 3, 2009

Day 3 Giveaway and a Winner!

Thanks Becca @ Blue Cricket Design for showing us those adorable ornaments! I think everyone loves the frame on your front door with the ornaments. So cute!

Here is my try at Becca's creation.


For some reason I am really into polka dots and glitter right now.


You like it??


We have a winner for giveaway # 1

Using Tara Frey's Random Number Generator, the lucky number was 14.

Congrats to Julz who said...

"Just became a follower. Gotta say love your ideas!!"

Thanks Julz, please send me an email (kristin(dot)heaney(at)gmail(dot)com) with your mailing address and I will send these ornaments right out to you.


Now onto my latest giveaway. I would give this ornament to someone but it is a little hard to ship, sooooooooooo for all of you MODA lovers out there I have a little prize for you. I would show you what I am making from these little packs but it is top secret until Christmas.

I am giving away 1 of these cute mini charm packs from the Moda Bake Shop Sampler Box.

You can choose between Garden Party by Blackbird Design

OR

Lakeside Resort by Holly Taylor


What to win one? You have 2 chances to win again.

1. Become a follower and leave a comment (or if you already are a follower let me know).

2. Tell me what you would make with one of these little charm packs.

This giveaway ends on Saturday around 7 pm eastern time.

GIVEAWAY CLOSED

So, are we havin' fun yet????

Check back tomorrow to see Linds @ That's So Cuegly's ornament. I haven't seen it yet so we will all be surprised together.