Wednesday, December 2, 2009

Day 3 Handmade Christmas Ornaments

Welcome to Day 3 of the Handmade Christmas Ornaments Party!


Glad you could make it! There are 2, yes 2, giveaways happening. Go check them out here and here.


Today, Becca @ Blue Cricket Design is bringing you some sweet and colorful ornaments. And just wait until you scroll down and see what she does with her front door.


So amazingly creative, I LOVE IT!


So here is Becca, have a wonderful Thursday!


I'm so thrilled to be here sharing with you my Homemade Christmas Ornaments! What an exciting event!

I'm Becca from Blue Cricket Design! I fell in love with the Idea of Paper Mache Ornaments when I was first introduced to them by my cousin! I did a fun Halloween version found here and have been counting down the days 'till Christmas was upon us and I could finally create my own Christmas version! Well wait no longer my friends! 'Tis the Season for Christmas Ornaments!!!


Here's the "How To" low down...

What you'll need:


  • Those glass ornaments I'm sure you can find in your Christmas stash! If you need to go get some check your thrift stores first! I picked up a 24 pack for 50 cents!!! SCORE!

  • A newspaper or all your left over Black Friday ads!

  • The magic Craft necter MOD PODGE

  • Paint

  • Patience...the painting can take a while!

  • Wire or Ribbon for hanging

  • Beads for added touch!


  1. Get your balls ready! (trying not to laugh over here!)

  2. Take newspaper and rip it in to thin strips. If you rip from the top of the page to the bottom it rips super smooth and even. HINT!!The thinner the strips the smoother the paper will lay. Strips should be about 1/4"- 1/2" thick.

  3. Mix 1 part water with 1 part Modge Podge! Enough to submerge your paper in.

  4. Dip each strip into the MP mixture being sure to get it completely wet. Using your fingers wipe off excess mixture.


5. Start wrapping the wet paper strips onto the ornaments.
6. Continue wrapping paper strips and be sure to get the lip of the bulb that holds the top hanging thing.
7. Cover all of your ornaments completely.
8. Hang them to dry over night!


Once they are completely dried you can start to get crazy and paint your heart out!
Get creative with your designs and patterns!


Start with your base coats! I used the same color theme I have going on through out my entire home for the Holidays! Red, Green, White and Blue!


Once the base coat is dry you can start getting really creative! To create perfect circles use a glue stick cap and dip it in paint. Fill it in and there you have it!

For fine detail work I used a tooth picks! It was perfect for my Snowflakes and Swirls! Lastly I sprayed mine with a fine Silver Glitter Spray for a hint of sparkle!


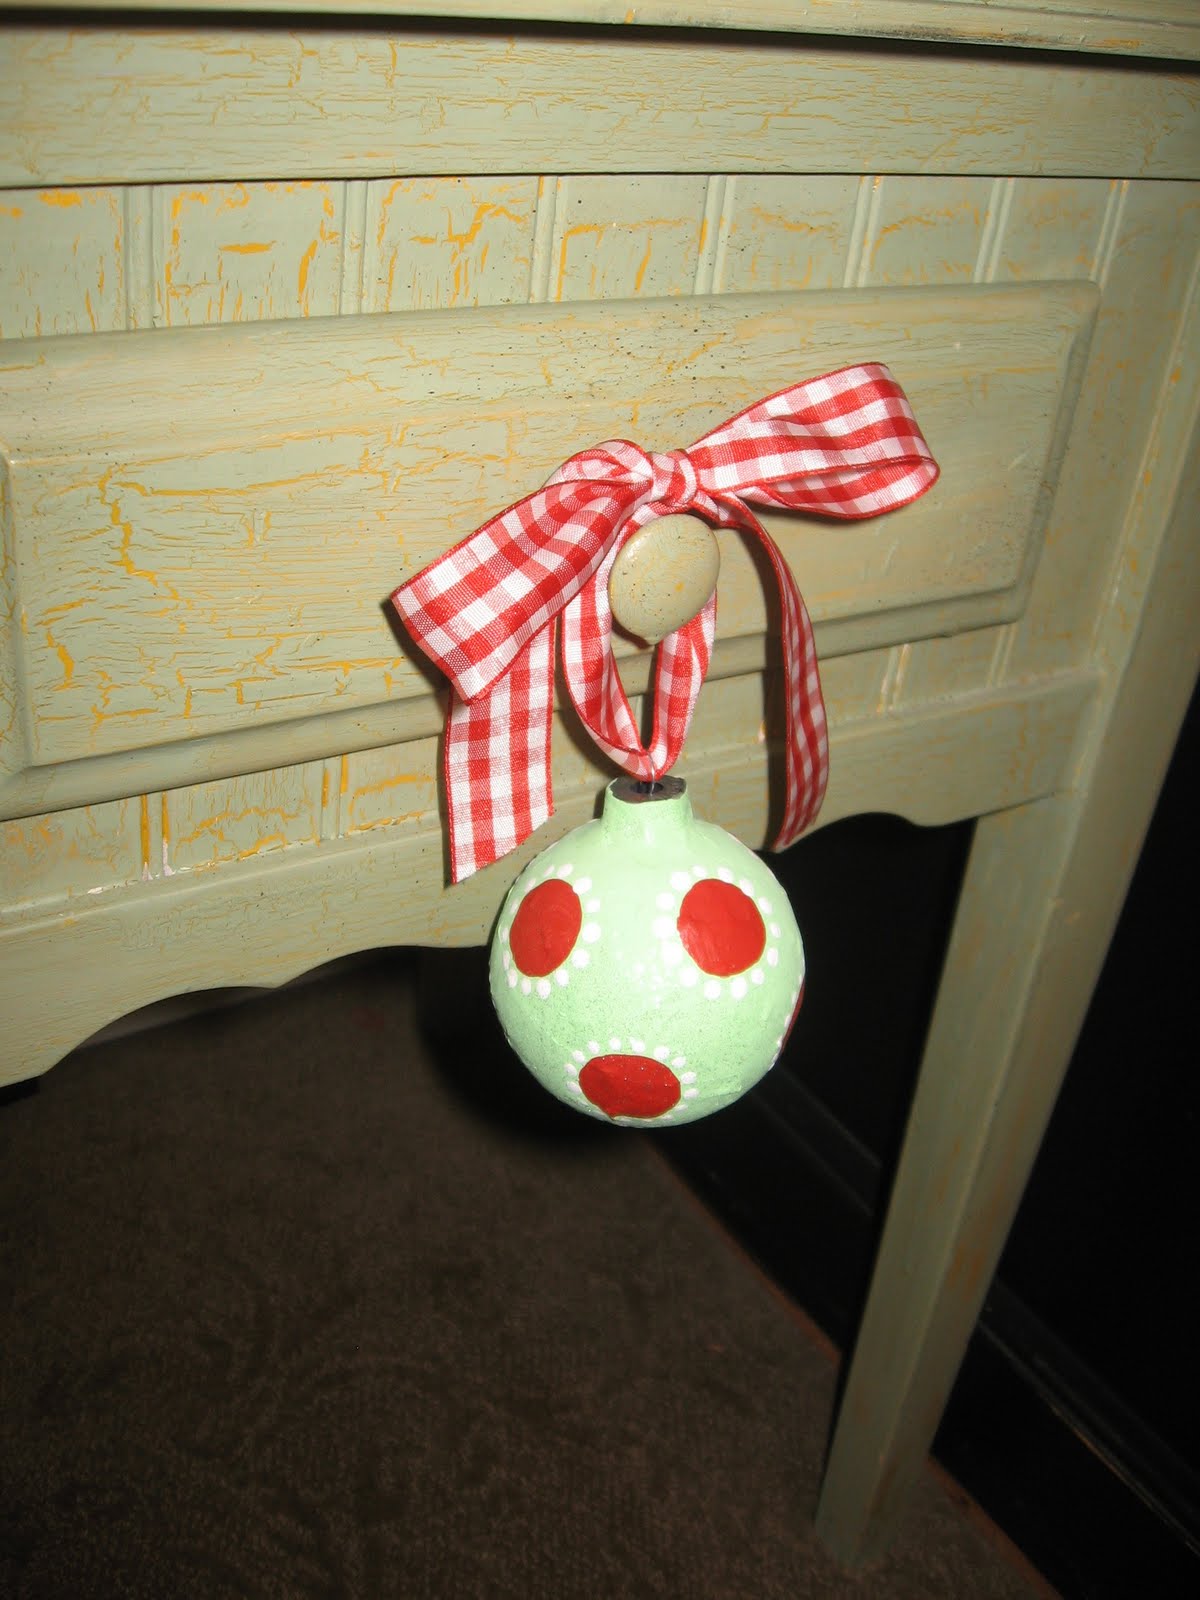
Add wire and beads if you plan on hanging them!I used Ribbon to hang mine! And think beyond the limbs of your Christmas Tree when it comes to hanging!
I have mine hanging on door knobs and cupboard knobs throughout my house. You could also display them in a bowl or basket or jar just as they are!


And Check out how fantastic they look hanging in my Frame on my front Door!


These ornaments are worth the effort! They are as detailed as you want! You can see I kept mine pretty simple! Whimsical charm awaits you as you create your custom ornaments! They also make perfect Neighbor Gifts or gifts for Teachers! Add a simple tag with a special message!

Come check out all my other fun Christmas ideas I have waiting for you over at
Blue Cricket Design!

Happy Holidays friends!

Love,
Becca

Day 2 Ornaments and a Giveaway!

Is everyone having a fantastic afternoon? This little ornament party is so fun!
How about Amy's sweet little star ornament???
Again I was inspired to make my own version of Amy's ornament last night (could somone remind me to go to bed at a decent hour, apparently I have two little boys who would like their mommy to wake up on time in the morning)!
Thanks again Amy @ Mod Podge Rocks for participating.
I wasn't able to make Amy's ornament exactly but I think it is a nice combination of Dani's & Amy's tutorials.
You see if I went to the craft store EVERYDAY, then the
National Department of Husbandry
might shut this operation down, and I just can't have that happen.
So I took the supplies I had on had and made this cute little ornament. I am lovin' it!

And while I was at it, I made some more my sister, my mom and my aunt. All with the initials from their last names. This is what keeps me up at night. I cannot seem to stop at one.
Do you like them? Well you can win one with your family's initial or any letter you want.


How do I win you ask?


Well let's make it fun shall we...you can have 2 chances for this giveaway.

1. Become a follower and leave me a comment (or leave a comment letting me know you are already a follower).
2. Tell me your favorite Christmas song (if you know the artist leave that too) and you will probably hear it on my playlist.

You have until Friday evening around 7 PM Eastern Time to enter the Day 2 giveaway.

Oh! And don't forget to enter my Day 1 giveaway. That one ends at 7 pm tomorrow (Thursday) night.
GIVEAWAY CLOSED


Now back to your regular Wednesday afternoon activities.
Today, Lil J is pretending to be Santa while riding our snowman.
I hope the snowman is OK.


Make sure to check back tomorrow, Becca @ Blue Cricket Design will bring you her sweet little design. It is so cute, I cannot wait to show you all!

Day 2 - Mod Podge Rocks Ornament!

Welcome to Day 2 of the 12 Days of Handmade Christmas Ornaments!

I really hope you are enjoying these ornaments as much as I am.

Today, Amy @ Mod Podge Rocks is bringing us her sweet star ornament.

It is absolutely adorable! If you are just joining us today, take a minute to look at the Day 1 ornament and be sure to enter my very first giveaway!


Here is Amy...


Well hallo there - this is Amy from Mod Podge Rocks! You may have seen me around, but if you haven't you should know that Mod Podge is one of the best things in the world, at least as far as craft items go. I feature a new Mod Podge project nearly every day from someone awesome on the internet (and some from myself too), so come by and see what we're doing!
My ornament combines several things that I love:
1. Typography - combinations of letters and numbers in fun fonts tickle me.
2. Stars - loved them since I was a child. I even have a sterling silver star bracelet my mother gave me for Christmas when I was 10 - it's one of my most prized possessions.
3. Blue - it's the best color.
4. Buttons - I played with my great-grandmother's collection endlessly when I was young.
5. Polka dots - I've just always had a thing for them. It's either that or stripes every day.
6. Mod Podge - needs no explanation!
Let's get started.
Supplies & Tools:
FolkArt® Acrylic Paint - Teal and Wicker White
Mod Podge® - Gloss
FolkArt® Extreme Glitter - Hologram
Paper Mache Ornament - star shape
Scrapbook paper - 1 sheet of holiday, I used
Brenda Walton Peppermint Twist from K & Co.
Wood numbers - I used "25" for the big day of Christmas
Buttons - 5 small pink or coordinating
Flat Paint Brush
Beacon Premium Tacky Glue
Scissors
Pencil or pen

Grab your ornie and trace it onto the paper face up. Flip over and trace again. I always do this because sometimes items that look normal are actually shaped kind of weird - ie., not the same on both sides. Tracing on both sides is better, you see?
Paint your star with Teal, but only do it around the edges. The paper is going to be covering it, which is nice because you can be a little lazy like me. Make sure to put on several coats since paper mache is harder to cover. I did about three. Allow to dry. Go ahead and paint the numbers at the same time. Allow those to dry too.
Take your Hologram Extreme Glitter and paint the edges. You are going to LOVE this stuff if you like glitter. It goes a long way, and there is no mess. Do about three coats and you'll have a nice little effect.
Start on one side and get your Mod Podge on! Spread Mod Podge over the star, giving a medium coat. Make sure to get the star tips well.
Press down the paper throughly - smooth, smooth, smooth! You can't smooth enough. If Mod Podge comes out the side, simply wipe away with your brush. Repeat with the other side. Allow to dry for 15 - 20 minutes. Then coat the outside with Mod Podge! DON'T coat the Extreme Glitter, because you'll dull the glitter effect. Coat one side, allow to dry, flip over and repeat.
This is really fun. I mean REALLY fun. Take the end of your paint brush and dip into Wicker White - Tap the end of the brush lightly onto the wood letter to get polka dots! You can't tell here, but I'm having a blast.
Now that the ornie is nearly complete, use your Beacon Tacky Glue to glue down the wood letters as well as some button accents. Now doesn't that look nice?


Thanks for visiting, and thank you to Kristin for hosting me here. I hope you will stop by Mod Podge Rocks when you have a chance. I do love visitors. See you soon.

Tuesday, December 1, 2009

Day 1 Giveaway!

Day 1 of the 12 Days of Handmade Christmas Ornaments was awesome!

Thank you again Dani for kicking off this little holiday party. So I of course had to head straight over to the craft store after dropping off the kiddos at preschool to get some supplies and make a couple of these cutie ornaments from The Craft Rookie.

And here you go!

Three handmade ornaments including a mitten, snowflake and bulb ornament.


Want to win them??? I would love to give them away!

Won't they be adorable on your own tree?

Just become a follower and leave me a comment.

Already a follower? Just leave me a comment and let me know.

I will choose a winner on Thursday evening - let's say around 7 pm eastern time.
GIVEAWAY CLOSED


Be sure to check back in tomorrow for Day 2 of our 12 Days, Amy @ Mod Podge Rocks is posting and you will definitely want to see her adorable creation.


Day 1 Kick Off! 12 Days of Handmade Christmas Ornaments

Welcome to the wRIte iT DOwN
12 Days of Handmade
Christmas Ornaments!


Be sure to check back here each day! We will have 12 different amazing crafty bloggers over the next 12 days showing off their handmade oraments along with the tutorials to make them!


Kicking off our ornament party is

Dani @ The Craft Rookie!

This very sweet lady has been my brainstorming buddy for this party. She is also the designer of my blog button. Thank for everything Dani! I am so excited you are a part of this!
So here she is, these ornaments are so cute and creative, hope you enjoy!


Happy December ~ it's finally here!


Hello Fellow Crafters! I am SO excited to be posting on Day One of Kristin's 12 Days of Handmade Christmas Ornaments!!! (And I want to publicly apologize to Kristin for giving her a heart attack by not sending her this post until what is probably midnight (or later) her time.) SO SORRY KRISTIN!!!! The day got away from me....

First of all, let me introduce myself really quickly. My name is Dani--aka The Craft Rookie. I've been blogging about my crafting endeavors for about 9 months now...and I'm loving it. :) I love to sew, (attempt to) cook, use my staple gun, and my current motto is: "When in doubt, Mod Podge." :) If you have a few minutes (after checking out Kristin's terrific blog, of course!) you should stop by my blog and take a look around. There's something for everyone, I think! :)

Well, onto....


If you follow my blog, you may have seen this post from late September. I've made a few additions to the post, along with a picture of our tree for this year, so keep reading!!! :)


Last year we had a little mini-tree like this:


Because we didn't have room in our small apartment for a big one.

But this year we have more room, so we decided to get a full-size tree. The only problem? We only had little mini-ornaments...and I had a feeling they'd look pretty wierd on a big one. :) So it was time to start making ornaments for our full-size tree.

Since we don't have a lot of storage space (or a lot of money) we didn't want to invest in the bulbs that take up so much room to store (and cost a lot.) So I went to Hobby Lobby and found these great wooden Christmas shapes. They were 4/1.00! I can handle that. :)

Then I bought some clearance patterned paper (I think they were trying to get rid of the leftover stuff from last year...but heck, it's all red and green, so it works for me. ;)

I also bought some red and green ribbon to help decorate them.

First, I cut out a little bit of paper big enough to cover the first shape.

Then I put some mod-podge on the shape, layed the paper on it, and smoothed out the bubbles. (For more detailed instructions on mod-podging, click HERE.)

After the mod-podge under the paper has dried, put a layer of mod-podge over the top of it to give it a shiny, glossy, hard cover. Let it dry, then coat it a couple more times until it looks how you want it to.

After the mod-podge had dried everywhere, I took a foam brush, and sponged the edges of the shapes with some silver toll paint. I let that dry, and then added embellishments like buttons, ribbons, etc. to each shape.

Next I sprayed a layer of glitter over all of them. :) It looks cool when the lights on the tree catch the glitter and make the ornaments look sparkly.

Tu-duh!

Candy Cane

Bulb

Tree

Stocking

Present

Reindeer

Gingerbread Man

These would also make great tags for larger presents. :) Oh, and in case you were wondering, I drilled a little hole in the top of each of these and put a hook through them so they can hang on the tree. :)

Here they are on our oh-so-large tree (It's about 7.5 feet tall--I swear it didn't look that big in the tree lot! :))


I also borrowed some extra traditional bulbs from my parents which helped fill the tree out a bit....


So how do you think they turned out? I think they turned out pretty cute, and they give the tree an old-fashioned look, which I love. :)


I can't wait to see what handmade ornaments people are going to show off over the next couple of weeks! Isn't this such a great idea? Kristin is one smart chickie! Thanks for letting me stop by your blog, Kristin...and once again, sorry for the mini-heart-attack!! I hope we are still cyber-friends!
Happy Holidays to all my wonderful blogging friends!

Photobucket